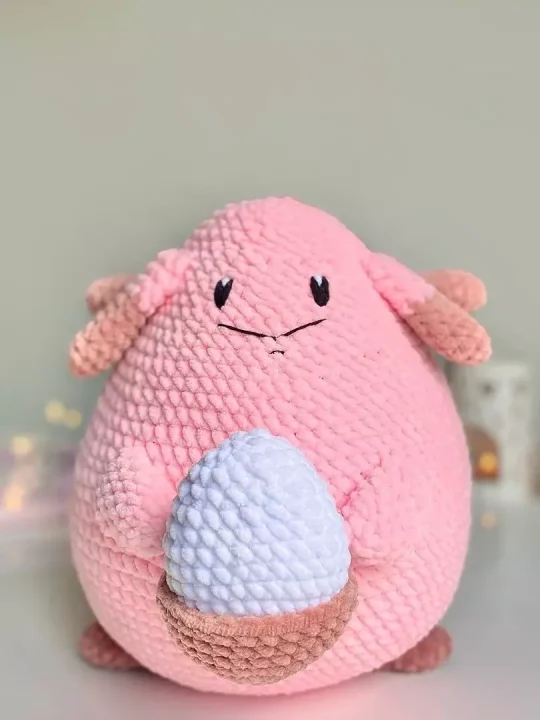
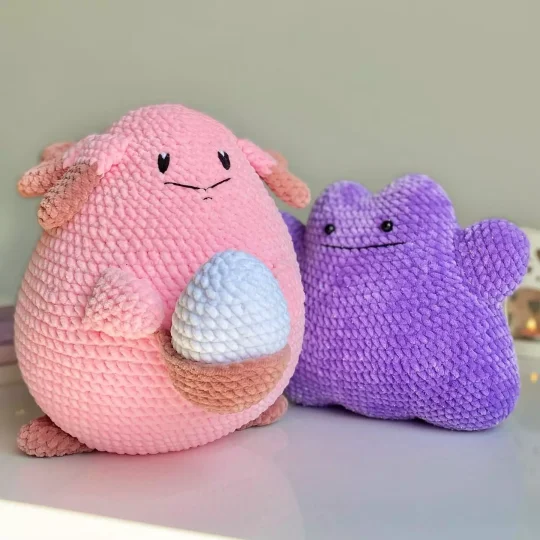
Introducing the adorable Chansey crochet pattern, perfect for all Pokemon fans and crochet enthusiasts alike! This pattern allows you to create your very own Chansey, the iconic pink Pokemon known for its nurturing and healing abilities. With its soft and huggable design, this crochet pattern is sure to bring joy to anyone who loves these lovable creatures.
Whether you’re a beginner looking for a fun project or an experienced crocheter seeking a new challenge, this pattern has something for everyone. You’ll enjoy creating each stitch and seeing your Chansey come to life with its charming smile and distinctive egg-shaped body.
Not only is this Chansey crochet pattern a delightful addition to your Pokémon collection, but it also makes a thoughtful handmade gift for friends and loved ones. Whether you’re crafting it as a gift for a Pokémon enthusiast or as a special treat for yourself, this Chansey crochet pattern is a wonderful way to showcase your creativity and bring a touch of Pokémon magic into your crochet projects.
Get ready to embark on a crochet journey filled with cuteness and nostalgia as you create your very own Chansey!
Pattern designer: CatKnit
Materials
- Colour A: Cygnet Jelly Baby Chunky – Blush
- Colour B: Hobbii Baby Snuggle Solid – Dusty Rose
- Colour C: Cygnet Jelly Baby Chunky – White
- Colour D: Rico Ricorumi DK – Black
- Colour E: Rico Ricorumi DK – White
- Crochet Hook: 4mm
- Toy stuffing
Abbreviations
Sc – single crochet
Inc – increase
Dec – decrease
Sl st – slip stitch
Body
Rnd 1: Using colour A, work 6 sc in magic ring (6)
Rnd 2: Inc in each st (12)
Rnd 3: [1 sc, 1 inc] x6 (18)
Rnd 4: [2 sc, 1 inc] x6 (24)
Rnd 5: [3 sc, 1 inc] x6 (30)
Rnd 6: [4 sc, 1 inc] x6 (36)
Rnd 7: [5 sc, 1 inc] x6 (42)
Rnd 8: [6 sc, 1 inc] x6 (48)
Rnd 9: [7 sc, 1 inc] x6 (54)
Rnd 10: [8 sc, 1 inc] x6 (60)
Rnd 11: [9 sc, 1 inc] x6 (66)
Rnd 12: [10 sc, 1 inc] x6 (72)
Rnd 13: [11 sc, 1 inc] x6 (78)
Rnd 14: [12 sc, 1 inc] x6 (84)
Rnd 15-26: Sc in each st
Rnd 27: [12 sc, 1 inv.dec] x6 (78)
Rnd 28: Sc in each st
Rnd 29: [11 sc, 1 inv.dec] x6 (72)
Rnd 30: Sc in each st
Rnd 31: [10 sc, 1 inv.dec] x6 (66)
Rnd 32: Sc in each st
Rnd 33: [9 sc, 1 inv.dec] x6 (60)
Rnd 34: Sc in each st
Rnd 35: [8 sc, 1 inv.dec] x6 (54)
Rnd 36: Sc in each st
Rnd 37: [7 sc, 1 inv.dec] x6 (48)
Rnd 38: Sc in each st
Rnd 39: [6 sc, 1 inv.dec] x6 (42)
Rnd 40: Sc in each st
Rnd 41: [5 sc, 1 inv.dec] x6 (36)
Rnd 42: Sc in each st
Rnd 43: [4 sc, 1 inv.dec] x6 (30)
Rnd 44: Sc in each st
Start stuffing the body firmly and top up as you go, you’ll want
to make sure the egg gets nice and wide so keep stuffing the sides.
Rnd 45: [3 sc, 1 inv.dec] x6 (24)
Rnd 46: Sc in each st
Rnd 47: [2 sc, 1 inv.dec] x6 (18)
Rnd 48: [1 sc, 1 inv.dec] x6 (12)
Top up the stuffing.
Rnd 49: Inv.dec in each st (6)
Sew the last sts together and fasten off.
Arms x2
Rnd 1: Using colour A, work 6 sc in magic ring (6)
Rnd 2: Inc in each st (12)
Rnd 3-7: Sc in each st
Fasten off, leaving a long tail for attaching later. DO NOT STUFF.
Legs x2
Rnd 1: Using colour B, work 6 sc in magic ring (6)
Rnd 2: Inc in each st (12)
Rnd 3-7: Sc in each st
Fasten off, leaving a long tail for attaching later. DO NOT STUFF.
Hair x6
Rnd 1: Using colour B, work 6 sc in magic ring (6)
Rnd 2: Inc in each st (12)
Rnd 3-7: Sc in each st
Rnd 8-11: Change to colour A, sc in each st
Fasten off, leaving a long tail for attaching later. DO NOT STUFF.
Pouch
Rnd 1: Using colour B, work 6 sc in magic ring (6)
Rnd 2: Inc in each st (12)
Rnd 3: [1 sc, 1 inc] x6 (18)
Rnd 4: [2 sc, 1 inc] x6 (24)
Rnd 5: [3 sc, 1 inc] x6 (30)
Rnd 6-9: Sc in each st
Fasten off leaving a long tail for attaching later.
Egg
Rnd 1: Using colour C, work 6 sc in magic ring (6)
Rnd 2: Inc in each st (12)
Rnd 3: [1 sc, 1 inc] x6 (18)
Rnd 4: [2 sc, 1 inc] x6 (24)
Rnd 5: [3 sc, 1 inc] x6 (30)
Rnd 6-10: Sc in each st
Rnd 11: [3 sc, 1 inv.dec] x6 (24)
Rnd 12: Sc in each st
Rnd 13: [2 sc, 1 inv.dec] x6 (18)
Rnd 14: Sc in each st
Start stuffing the egg, DO NOT overly stuff the egg, make sure it
fits in the pouch as you stuff it.
Rnd 15: [1 sc, 1 inv.dec] x6 (12) Top up the stuffing.
Rnd 16: Inv.dec in each st (6)
Assembly
- Legs: Attach the legs in in an outwards angle in row 11, with 20 sts in between on the front.
- Pouch: Attach the top of the pouch in row 24, centred between the two legs. Secure in place by make a few sts between the body and pouch in the rows below.
- Arms: Attach the top of the arms in row 28, with 15 sts in between the top corner of each arm, angled towards the egg so that they almost touch the sides of the pouch.
- Hair: Starting with the two front parts, attach these in row 41 with 10 sts in between.
- Attach the next two parts directly behind the front parts on the same row and repeat for the last two parts.
- Eyes: With a double stranded tail of colour D, across row 38-40, with 5 sts in between, make a upwards st across all 3 rows and
go over the same st 3 more times.With a double stranded tail of colour E, make a upwards st across row 40 in between the black sts, there should be 4
strands of black yarn on each side of your st. Go over the same st 2 more times.
Repeat for the second eye. - Mouth: Make a long st 1 row down from the eyes, 7 sts wide, fasten the middle of the mouth with a small st 1 row further down to create a smile. Make 1 more st 1 row down from the bottom of the mouth, 1 st wide. Fasten off and tie in loose ends.