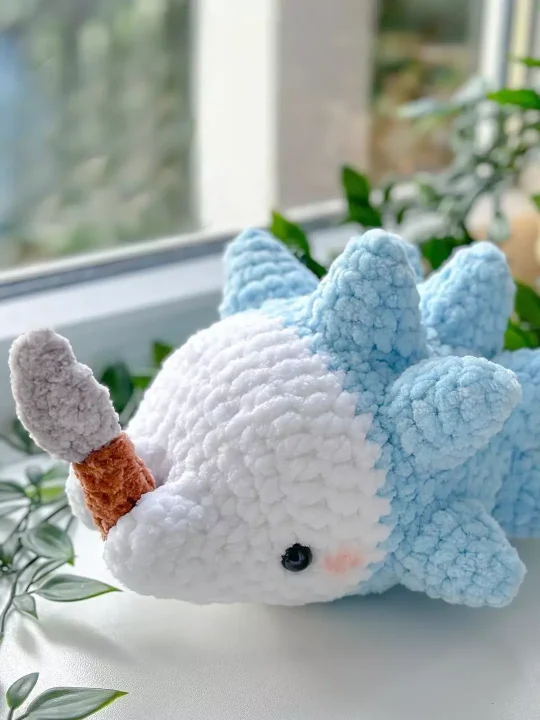
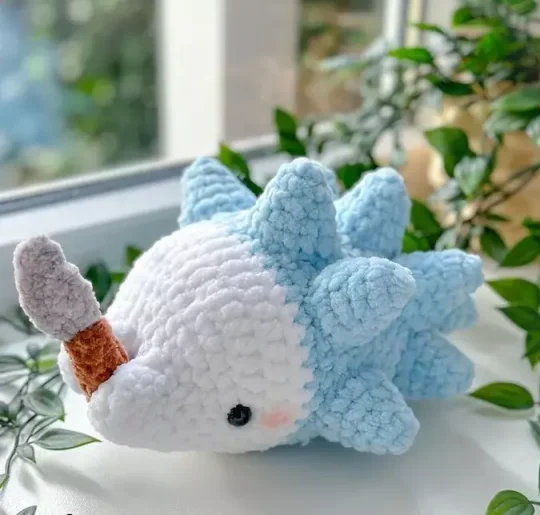
Oh, my stars and garters! Have you seen something so cute it just made your heart do a little flip? Well, prepare for your heart to somersault because I stumbled upon the most adorable Snom Pokemon pattern. Honestly, it just screams “hug me!”
Picture this: you’re nestled in your comfiest chair, a warm cup of tea in reach, and your trusty crochet hook in hand. With each twist and turn of your hook, the little Snom starts taking shape. It’s a whimsical adventure through stitches and yarn that leads to a squishy, cuddly Pokemon friend.
Now, this isn’t just your run-of-the-mill pattern – oh no! It’s a symphony of single crochets, magical increases, and sneaky decreases. And, goodness gracious, the texture! It’s like frosty joy bundled up in yarn form. Don’t get me started on the color choices; they’re as soft and inviting as a snowflake’s kiss.
So if you’re itching to get started on a project that’s a little bit quirky – and a whole lot of adorable – this free Snom Pokemon pattern is your ticket to crochet nirvana. Need I remind you, mistakes are part of the charm, so if your Snom’s got a lopsided smile or a wonky antenna, just remember it’s unique, just like you. Happy hooking!
Designer: By.Geekie
Materials & Tools
- 5 mm crochet hook
- Needles and pins
- 10 mm safety eyes x2
- White/Cream yarn
- Blue/Pink yarn
- Stuffing
- Scissors
- Stitch marker
Abbreviations
Mr – magic ring
Sc – single crochet
Inc – increase
Dec – decrease
Sl st – slip sttch
Bbl – booble stitch (6 loops)
BLO – back loops only
Hdc – half double crochet
Snout & Body
Starting in white/cream.
Rnd 1: 5 sc in Mr (5)
Rnd 2: inc around (10)
Rnd 3-4: sc around (10)
Fasten off and leave a tail to sew the gap between the snout later on. Repeat R1-R4 but do not fasten off this time.
Connect the two parts of the snout together with a sc, this counts as your first st of R5.
Rnd 5: continue 9 sc on one side of the snout and 10 sc on the other side (20)
Rnd 6: 5 sc, (sc, inc) x 5, 5 sc (25)
Rnd 7: 5 sc, (sc, inc, sc) x 5, 5 sc (30)
Rnd 8: 5 sc, (3 sc, inc) x 5, 5 sc (35)
Rnd 9: 5 sc, 25 hdc, 5 sc (35)
Rnd 10: 7 sc, 21 hdc, 7 sc (35)
Rnd 11: sc around (35)
Sew the gap between the snout if needed.
Change color to blue/pink
We will be alternating between color in this part. White/cream and blue/pink. Feel free to skip the bbl’s if you don’t want the tiny feet.
Rnd 12: in BLO, sc around (35)
Start stuffing and insert the eyes between R8-R9, 18 stitches apart.
Rnd 13: (4 sc, inc) x 7 (42)
Rnd 14: 5 sc, bbl, 32 sc, bbl, 3 sc (42)
Rnd 15-16: sc around (42)
Rnd 17: (dec, 4 sc) x 7 (35)
Rnd 18-20: sc around (35)
Rnd 21: 5 sc, bbl, (3 sc, dec) x 5, 2 sc, bbl, sc (30)
Rnd 22-23: sc around (30)
Rnd 24: 7 sc, (2 sc, dec) x 5, 3 sc (25)
Rnd 25: 7 sc, (sc, dec) x 5, 3 sc (20)
Rnd 26: 6 sc, 7 dec (13)
Finish stuffing.
Rnd 27: 3 dec, sc, 3 dec (7)
Close the hole and weave in the ends.
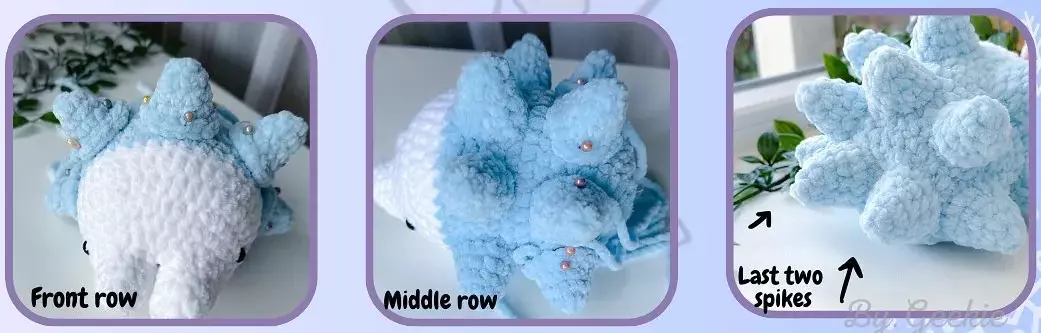
Spikes x12
In blue/pink.
Rnd 1: 4 sc in Mr (4)
Rnd 2: inc around (8)
Rnd 3: sc around (8)
Rnd 4: (sc, inc) x 4 (12)
Rnd 5: (sc, inc, sc) x 4 (16)
Fasten off and leave a long tail to sew.
Knife
Handle in brown.
Rnd 1: 4 sc in Mr (4)
Rnd 2: (sc, inc) x 2 (6)
Rnd 3-7: sc around (6)
Fasten off and leave a long tail to sew. Do not stuff.
Blade in Grey.
Rnd 1: 6 sc in Mr (6)
Rnd 2: sc around (12)
Rnd 3: ch 1 and fold in half, like a taco and 6 sc around the edge.
Fasten off.