Now, let’s get the yarn ball rolling, shall we? Picture this: A tiny, no-sew amigurumi frog that could practically hop into your pocket and brighten your day. It uses those nifty bobble stitches to give our amphibious friend some delightful texture.
And the best part? It’s as if the crochet gods have heard our prayers because there’s no sewing involved. Yes, you heard that correctly. No need to wrestle with a darning needle after you’re all done hookin’.
Crafting this little critter stirred up a whirlpool of emotions. There’s something incredibly satisfying about seeing a spool of yarn transform into a miniature companion. You start with just a hook and yarn, and before you know it, you’ve got a palm-sized frog staring back at you. I must admit, battling with the bobble stitch was a test of patience at first—but, as my grandma used to say, “Practice makes perfect,” and she was spot on (as always).
Finished, it looked so darn adorable, I could hardly believe I made it. Now, imagine having such a cutie pie nestled in your pocket, ready to make your heart leap with joy at every glance. Exciting, right? Well, grab your tools, and let’s hop to it!
Designer: Lecromi
Materials & Tools
- Chenille/ Velvet yarn
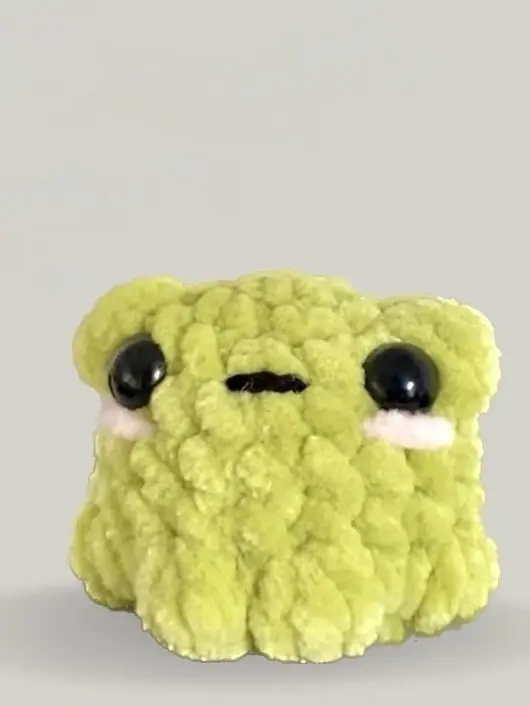
- Body: green, mouth: black, blush: pink
- 3.0 mm crochet hook
- 8 mm safety eyes
- Stuffing
- Stitch marker
- Darning needle
- Scissors
Abbreviations
Mr – magic ring
Sc – single crochet
Inc – increase
Dec – decrease
Bo – bobble stitch

Frog
Rnd 1: 6 sc in MR (6)
Rnd 2: 6 inc (12)
Rnd 3: inc, sc, inc, bo, (inc, sc) x 2 inc, bo, inc, sc, inc (18)
Rnd 4-6: sc around (3 rounds) (18)
Rnd 7: 6 sc, bo, 2 sc, bo, sc, bo, 2 sc, bo, 3 sc (18)
Rnd 8: (sc, dec) x 6 (12)
Start stuffing.
Rnd 9: 6 dec (6)
Fasten off and sew the hole close.
Add a mouth between the eyes and blush.
Done!