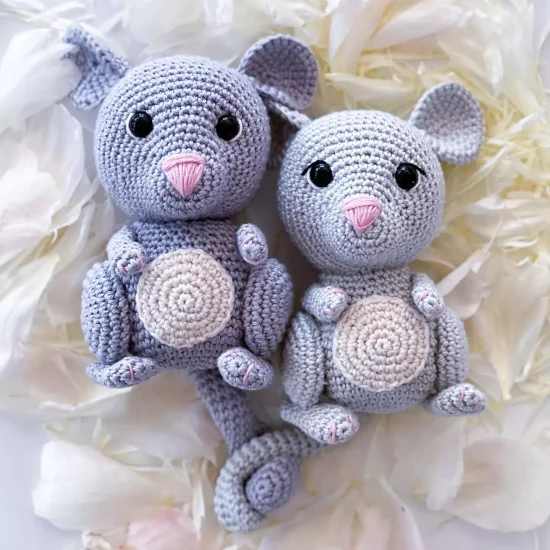
Good day, crochet lovers! Let me pull back the curtain on my latest endeavor – a charming amigurumi chinchilla crochet pattern. This tiny, endearing critter is a joy to create and – drumroll, please – it’s free! This pattern allows your creativity to take flight. So go ahead, play with those hues, stitch textures, let your imagination run wild!
As I sit here, weaving my love into each stitch, it feels akin to crafting magic. Conjuring life from yarn, transforming an inanimate skein into a cuddly pet is utterly awe-inducing. But remember, patience is key here. The detailing – the little ears, the swishy tail – it might test your skills a bit, but it’s worth every stitch. I promise!
So, my dear yarn artists, gather your treasured tools, select your most loved yarns, and let’s get hooking on this lovely adventure. Believe me, you won’t be able to stop yourself from finishing this enchanting chinchilla! Gift them to your adored ones, watch their faces light up. And don’t you dare forget to share your charming creations with me. Can’t wait to see your unique twist on it! Happy stitching!
Designer: Handmade by Halime
Materials
- Yarn: Scheepjes Catona. Colors: Mercury (074) and Light Silver (172)
- 2.2 mm crochet hook
- Fiberfill
- Stitch marker, scissors and embroidery needle
- 10 mm safety eyes
- Optional: furry wires
Abbreviations
Ch – chain
Sc – single crochet
Inc – increase
Dec – decrease
Rnd – rounds
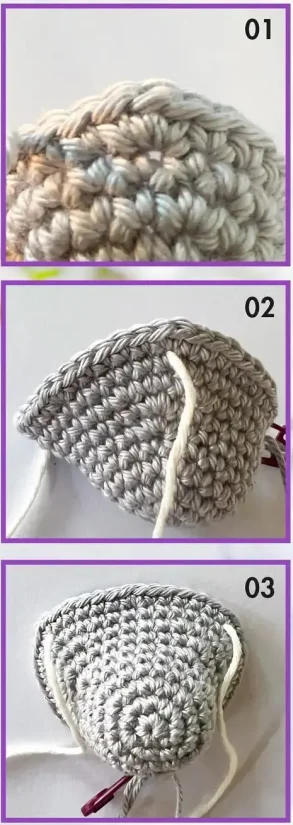
Head
Wark with grey yarn.
Rnd 1: 6 sc in a magic ring (6)
Rnd 2: (inc) x 6 (12)
Rnd 3: (1 sc, inc) x 6 (18)
Rnd 4: (5 sc, inc) x 3 (21)
Rnd 5: 21 sc (21)
Rnd 6: 7 sc, 3 sc in next st, 5 sc, 3 sc in next st, 7 sc (25)
Rnd 7: 8 sc, 3 sc in next st, 7 sc, 3 sc in next st, 8 sc (29)
Rnd 8: 7 sc, inc, 3 sc, inc, 5 sc, inc, 3 sc, inc, 7 sc (33)
Rnd 9: (10 sc, inc) x 3 (36)
Now we will mark where to place the safety eyes. Take a piece of yarn in another color and draw it in the hole under the stitch.
Rnd 10: (5 sc, inc) x 2, mark the hole inder next stitch: 1 sc, 4 sc, inc, 5 sc, mark next stitch same way, inc, (5 sc, inc) x 2 (42)
Rnd 11: 3 sc, inc, (6 sc, inc) x 5, 3 sc (48)
Rnd 12: (7 sc, inc) x 6 (54)
Now place the safety eyes where you marked with different yarn on round 10.
Rnd 13-18: 54 sc (54)
Rnd 19: (7 sc, dec) x 6 (48)
Rnd 20: 48 sc (48)
Rnd 21: 3 sc, dec, (6 sc, dec) x 5, 3 sc (42)
Rnd 22: 42 sc (42)
Rnd 23: (5 sc, dec) x 6 (36)
Rnd 24: 2 sc, dec, (4 sc, dec) x 5, 2 sc (30)
Stuff the head firmly.
Rnd 25: (3 sc, dec) x 6 (24)
Rnd 26: (2 sc, dec) x 6 (18)
Rnd 27: (1 sc, dec) x 6 (12)
Rnd 28: (dec) x 6 (6)
Fasten off and leave a small yarn tail. Weave the yarn tail through the front loops of each stitch and pull it tight to close. Then weave in the yarn end.
Body
Work with grey yarn.
Rnd 1: 6 sc in a magic ring (6)
Rnd 2: (inc) x 6 (12)
Rnd 3: (1 sc, inc) x 6 (18)
Rnd 4: 1 sc, inc, (2 sc, inc) x 5, 1 sc (24)
Rnd 5: (3 sc, inc) x 6 (30)
Rnd 6: 2 sc, inc, (4 sc, inc) x 5, 2 sc (36)
Rnd 7: (5 sc, inc) x 6 (42)
Rnd 8-16: 42 sc (42)
Rnd 17: (5 sc, dec) x 6 (36)
Rnd 18: 36 sc (36)
Rnd 19: 2 sc, dec, (4 sc, dec) x 5, 2 sc (30)
Rnd 20: 30 sc (30)
Rnd 21: (3 sc, dec) x 6 (24)
Fasten off and leave a long tail to sew to the head. Stuff the body with filling.
Belly
Work with creme yarn.
Rnd 1: 6 sc in a magic ring (6)
Rnd 2: (inc) x 6 (12)
Rnd 3: (1 sc, inc) x 6 (18)
Rnd 4: 1 sc, inc, (2 sc, inc) x 5, 1 sc (24)
Rnd 5: (3 sc, inc) x 6 (30)
Fasten off and leave a long tail for sewing to the body.
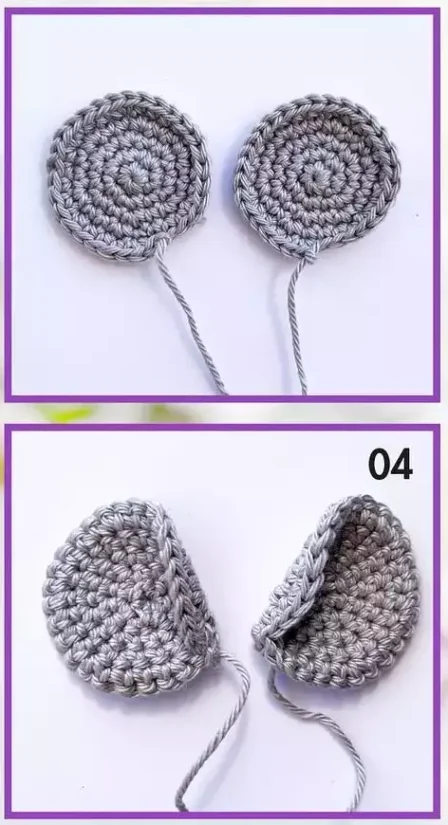
Ears x2
Work with grey yarn.
Rnd 1: 6 sc in a magic ring (6)
Rnd 2: (inc) x 6 (12)
Rnd 3: (1 sc, inc) x 6 (18)
Rnd 4: 1 sc, inc, (2 sc, inc) x 5, 1 sc (24)
Rnd 5: (3 sc, inc) x 6 (30)
Fasten off and leave a long tail for sewing.
Fold the eats on the corner and sew it on the side. Remember to fold the corners on the different direction on the two ears to fit right versus left side of the head.
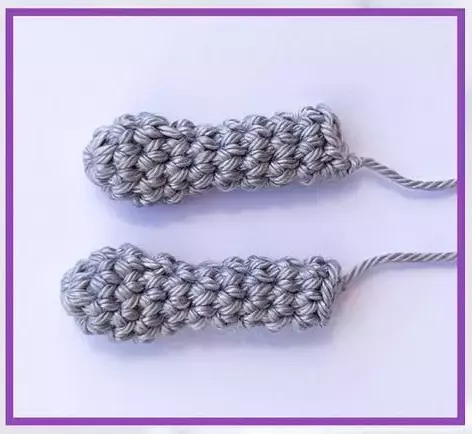
Arms x2
Work with gray yarn. Do not stuff.
Rnd 1: 6 sc in a magic ring (6)
Rnd 2: (inc, 2 sc) x 2 (8)
Rnd 3-4: 8 sc (8)
Rnd 5: (dec, 2 sc) x 2 (6)
Rnd 6-10: 6 sc (6)
Fasten off and leave a long tail for sewing.
Legs x 2
Work with grey yarn.
Rnd 1: 6 sc in a magic ring (6)
Rnd 2: (inc) x 6 (12)
Rnd 3: (1 sc, inc) x 6 (18)
Rnd 4: 1 sc, inc, (2 sc, inc) x 5, 1 sc (24)
Rnd 5: (3 sc, inc) x 6 (30)
Rnd 6-7: 30 sc (30)
Rnd 8: (1 sc, dec) x 10 (20)
Rnd 9: (2 sc, dec) x 5 (15)
Fasten off and leave a long t ail for sewing. Stuff the legs.
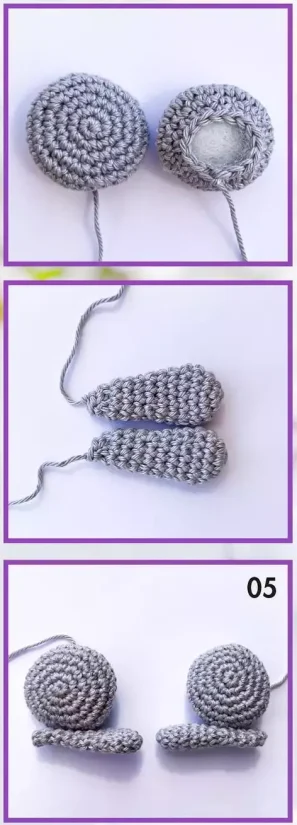
Feet x2
Work with grey yarn. Do not stuff.
Rnd 1: 6 sc in a magic ring (6)
Rnd 2: (inc) x 6 (12)
Rnd 3-4: 12 sc (12)
Rnd 5: (4 sc, dec) x 2 (10)
Rnd 6-7: 10 sc (10)
Rnd 8: (3 sc, dec) x 2 (8)
Rnd 9-11: 8 sc (8)
Rnd 12: (dec) x 4 (4)
Fasten off and leave a long tail. Flatten the piece and do not stuff. Weave the yarn tail through the front loops of each stitch and pull it tight to close. Now attach the foot at round 6-7 of the leg. Remember to place the feet different directions on each leg, so it fits right versus left side of the body.
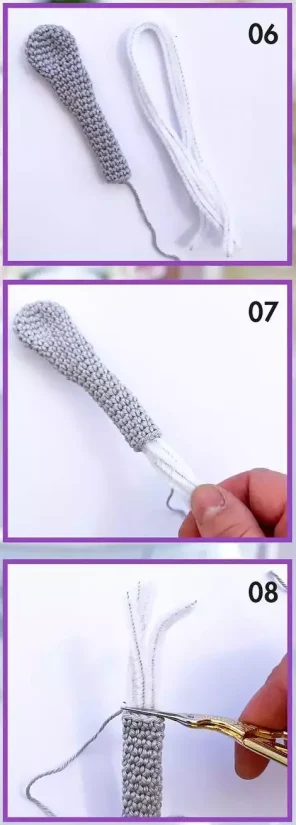
Tail
Work with grey yarn. Do not stuff if you will use wires.
Rnd 1: 6 sc in a magic ring (6)
Rnd 2: (inc) x 6 (12)
Rnd 3: (1 sc, inc) x 6 (18)
Rnd 4-6: 18 sc (18)
Rnd 7: (1 sc, dec) x 6 (12)
Rnd 8-13: 12 sc (12)
Rnd 14: (2 sc, dec) x 3 (9)
Rnd 15-26: 9 sc (9)
Fasten off and leave a long tail for sewing to the body.
*Take 2 furry wires and fold them. Insert the furr wires into the tail. Cut the wires that sticks out. Now you can bend the tail.
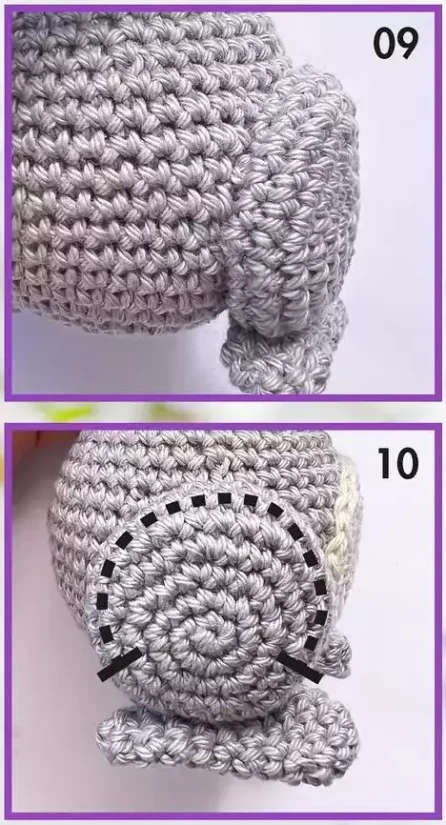
Assembly
- Attach the ears at round 19 and 20 of the head, with 9-10 stitches between the ears.
- Attach the body between rnds 12 and 20 of the head.
- Attach the belly between rnds 8 and 16 of the body.
- Atach the legs between rnds 7 and 15 of the bodu. Press the legs against the body and sew it at round 7 of the leg. Don’t sew the bottom of te leg. This is to give better balance between the legs and so the feet stands straight down.
- Attach the arms between rnds 17 and 19 of the body. Sew also on the sides so the arms stays niccely against the body.
- Attach the tail centeres back between rnd 6 and 7 of the body.
- Embroider the nose with pink yarn. Embroider whire area and/or lashes to the eyes.
- Embroider the claws on the hands and feet.
