Oh, my stars and garters! Have you seen this chic crochet Chanel-style handbag pattern floating around the web? It’s like someone took a slice of high fashion and turned it into a crafty delicacy just for us yarn enthusiasts. And let me express just how thrilled I am to see such an infusion of elegance into our beloved crochet world.
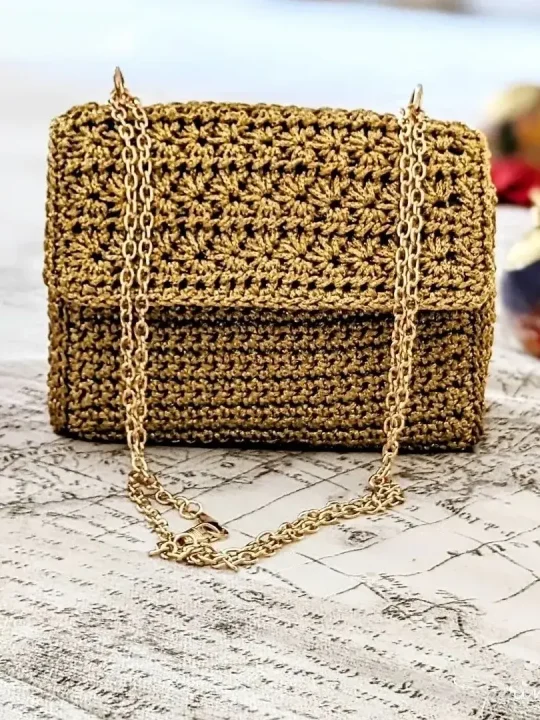
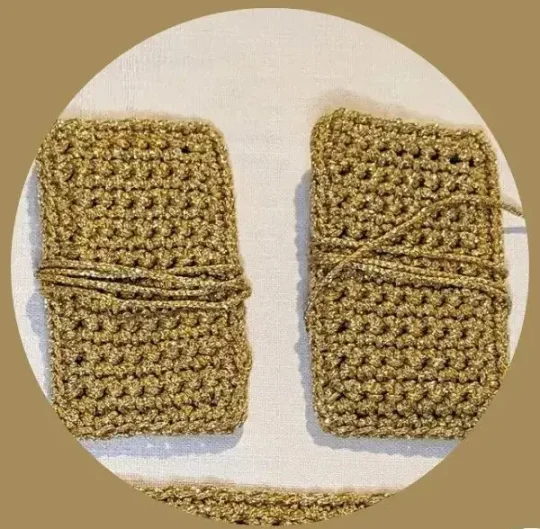
Now, drumroll, please… this bag is all about that shimmering gold-colored yarn – the kind that seems to have a little wink of sunlight in every strand. It crochets up into something quite sturdy while still having that plush touch. And that chain… we’re talking the pièce de résistance! It’s the golden river that cascades down the mountains of purl stitches. And when you fling this beauty over your shoulder, darling, it’s not just a bag—it’s an armful of glam!
Crafting this bag is like mixing a cocktail of skill and panache. Sure, it throws a couple of curveballs, but when you’re done, you get to bask in the glory of a masterpiece forged from your own two hands. Wear it to the market, to brunch, or to that oh-so-swanky evening do, and brace yourself for the inevitable flood of compliments.
“Where did you get that fabulous bag?” they’ll ask. And with a nonchalant shrug and a little smile, you’ll say, “Oh, this? Just something I whipped up.” Talk about a mic-drop moment!
Designer: Sperimenta Crochet
Materials & Tools
- 4.0 mm crochet hook
- Thai sublime lux yarn by Tessiland
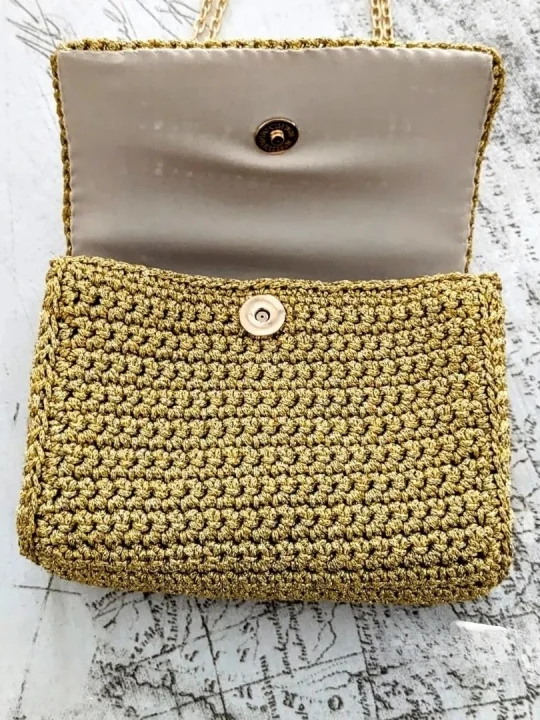
- Magnetic closure
- 2 bridges for bags
- Bah chain
- Plastic mesh
- Linning
Abbreviations
Cm – centimeters
Ch – chain
Sc – single crochet
Measures
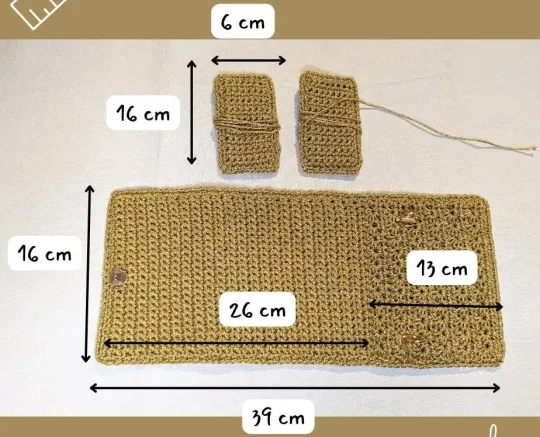
Bag
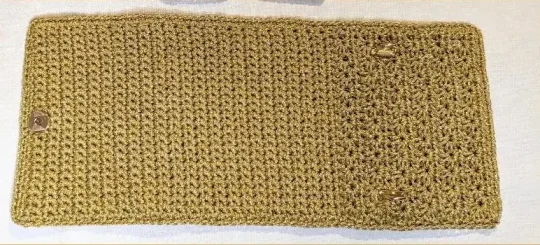
1. Create the rectangle panel, according to the measurements shown above, working the widest part in single crochet and the remaining part with the daisy stitch (start with an even number of stitches, for example, 24 chains)
2. Create two rectangular panels, according to the measurements shown above, working with single crochet (start with 8 chains)
3. Insert the “female” closure and the bridges through the crochet work and a rectangle of plastic mesh of the same size as the panel. Then insert the “male” part of the closure through the lining (rectangle with an edge approximately 2 cm more than the panel) and through the mest.
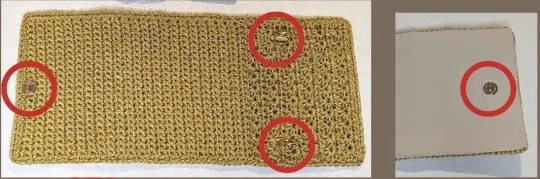
4. Attach the plastic mesh to the crochet work (panel and sides) by working a series of single crochet stitches along the perimeter, also inserting the rochet hook through the mesh. Then sew the lining with small hidden stitches.
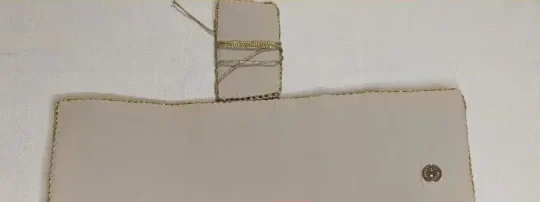
5. Sew the sides to the main panel with the needle, passing through the inner loops.

Done!
