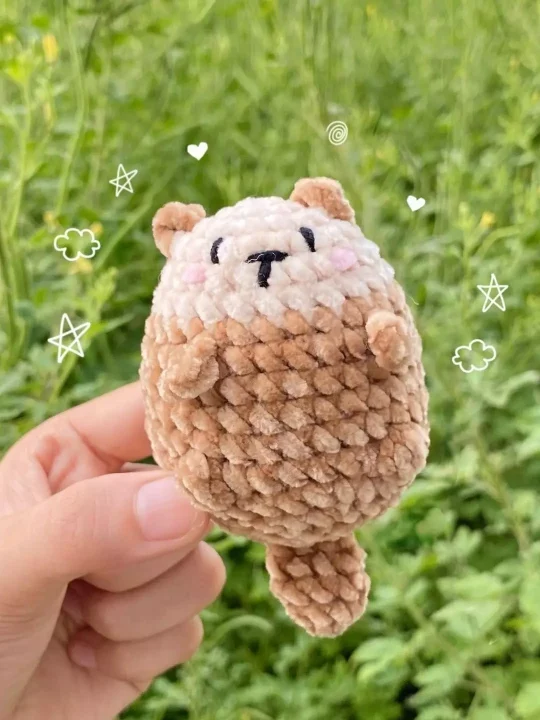
Well, my crafting comrades, just when I thought I’ve seen it all in the world of amigurumi, this one dives right in and steals my heart – the amigurumi otter. Isn’t it just the dreamiest thing? The intricate stitchwork that goes into crafting those dainty little paws… it truly is like watching magic unfold.
Every time I dive into this pattern, I feel like I’m by a serene riverbank, watching these playful creatures glide effortlessly through the water. The pattern is so meticulously crafted; the whiskers, the tail, and those beady little eyes that seem to twinkle…oh, it makes me all giddy inside! It’s hard not to fall in love with such a heartening project. And trust me, once you’ve finished this little buddy, it’ll be hard to let him go.
For all the crochet enthusiasts out there, this amigurumi otter is like a delightful dance of stitches, twirling and pirouetting into a mesmerizing masterpiece. Dive in, and let the waves of creativity carry you away…
Pattern Designer: Monua Crochet
Materials
- Velvet yarn (two color)
- 3mm crochet hook
- Black thread
- Fiberfill
- Stitch marker
- Needle
- Scissors
Abbreviations
Mr – magic ring
Sc – single crochet
Inc – increase
Dec – decrease
BO – bobble stitch
FLO – front loop only
Hdc – half double crochet
Body
Start with beige color.
Rnd 1: 6 sc in Mr (6)
Rnd 2: inc x 6 (12)
Rnd 3: (sc, inc) x 6 (18)
Rnd 4: (sc, inc, sc) x 6 (24)
Rnd 5-6: sc all the way around (24)
If you use safety eyes, place it between round 4-5, 5 stitches apart.
Change to brown yarn.
Rnd 7: (3 sc, inc) x 6 (30)
Rnd 8: 8 sc, BO, 6 sc, BO, 14 sc (30)
Rnd 9-12: sc all the way around (30)
Rnd 13: 8 sc, BO, 6 sc, BO, 14 sc (30)
Rnd 14: sc all the way around (30)
Rnd 15: (3 sc, dec) x 6 (24)
Rnd 16: (sc, dec, sc) x 6 (18)
Start stuffing the body.
Rnd 17: (sc, dec) x 6 (12)
Rnd 18: (sc, dec) x 4 (8)
Stuff the body firmly.
From here do not stuff the tail.
Rnd 19: FLO sc all the way around (8)
Rnd 20-21: sc all the way around (8)
Rnd 22: (2 sc, dec) x 2 (6)
Fasten off, leave a long tail and sew closed.
Ears x2
Chain 2, hdc in the first stitch.
Fasten off, leave a long tail and sew on round 3.
Embroider the eyes, nose and blushes on round 4 and 5.
You can also cut felt and glue it on.
So go ahead and give this pattern a try. Not only will you end up with an adorable new addition to your collection, but you’ll also experience the therapeutic benefits of crafting for yourself.