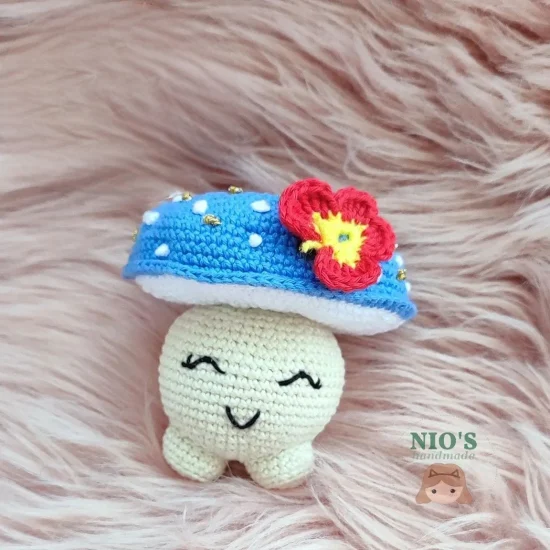
As I stumbled upon this free amigurumi mushroom crochet pattern, I couldn’t resist the urge to dive into its whimsical world. The idea of creating a tiny, magical toadstool out of yarn seemed like the perfect challenge for my crochet skills. And so, with my hook in hand and a smile on my face, I set out to follow the pattern and bring some enchantment into my life.
If you’ve never tried amigurumi before, don’t worry. It’s a fun and easy way to create small, stuffed animals and objects using basic crochet stitches. To start making your own adorable mushroom friend, all you need is some yarn in the colors of your choice, a crochet hook, stuffing material, and a bit of time and patience.
The pattern includes step-by-step instructions for creating the cap and stem separately, as well as how to assemble them together. You can customize your mushroom by adding spots or stripes to the cap or changing up the colors.
As someone who loves working with their hands and enjoys the satisfaction that comes with mastering new skills, this project provided me with both a challenge and an opportunity for self-expression. And best of all? Now you can join in on the fun too!
Pattern Designer: Nioshandmade
Materials
- Yarn of your choice in the following colors: stalk color, cap color, gills and scales color, black for face embroidery
- Any hook size to match your yarn
- Stitch marker
- Safety eyes (optional)
- Stuffing material
- Tapestry needle
- Scissors
Notes
- The pattern is worked in continuous rounds (spiral).
- Create the legs by crocheting and then sew them ot the stalk (the part of the face).
- The cap and the gills (under part of the cap) are sewn or crocheted together.
- Suggested using a hook size 1 to 1.5 mm smaller than suggested in the yarn label. This way you an crochet tighter and avoid creating gaps between the stitches.
Abbreviations
Mr – magic ring
St – stitch
Ch – chain
Sc – single crochet
Inc – increase
Dec – decrease
BLO – back loop only
FLO – front loop only
FO – fasten off
Stalk
Start with the color you chose for the stalk.
Rnd 1: 6 sc in mr (6)
Rnd 2: 6 inc (12)
Rnd 3: (sc, inc) x 6 (18)
Rnd 4: (sc, inc, sc) x 6 (24)
Rnd 5: (3 sc, inc) x 6 (30)
Rnd 6: (2 sc, inc, 2 sc) x 6 (36)
Rnd 7: (5 sc, inc) x 6 (42)
Rnd 8: (3 sc, inc, 3 sc) x 6 (48)
Rnd 9: (7 sc, inc) x 6 (54)
Rnd 10-17: (8 rounds) 54 sc (54)
Rnd 18: (7 sc, dec) (48)
Rnd 19: (3 sc, dec, 3 sc) x 6 (42)
Rnd 20: (5 sc, dec) x 6 (36)
Rnd 21: (2 sc, dec, 2 sc) x 6 (30)
Rnd 22: (3 sc, dec) x 6 (24)
Rnd 23: (sc, dec, sc) x 6 (18)
Stuff.
Rnd 24: (sc, dec) x 6 (12)
Rnd 25: 6 dec (6)
FO leaving a long tail to close the remaining hole with a tapestry needle by sewing in the FLO together and weave in the ends.
Legs x 2
Start with color you chose for te stalk.
Rnd 1: 6 sc in mr (6)
Rnd 2: 6 inc (12)
Rnd 3: (1 sc, inc) x 6 (18)
Rnd 4: in BLO 18 sc (18)
Rnd 5-6: (2 rounds) 18 sc (18)
Stuff firmly.
FO leaving a long tail for sewing.
Gills
Start with the color you choose for the gills
Rnd 1: 6 sc in mr (6)
Rnd 2: 6 inc (12)
Rnd 3: (sc, inc) x 6 (18)
Rnd 4: (sc, inc, sc) x 6 (24)
Rnd 5: (3 sc, inc) x 6 (30)
Rnd 6: (2 sc, inc, 2 sc) x 6 (36)
Rnd 7: (5 sc, inc) x 6 (42)
Rnd 8: (3 sc, inc, 3 sc) x 6 (48)
Rnd 9: (7 sc, inc) x 6 (54)
Rnd 10: (4 sc, inc, 4 sc) x 6 (60)
Rnd 11: (9 sc, inc) x 6 (66)
Rnd 12: (5 sc, inc, 5 sc) x 6 (72)
Rnd 13: (11 sc, inc) x 6 (78)
Rnd 14: (6 sc, inc, 6 sc) x 6 (84)
FO if you want to crochet gills with the cap. IF you want to sew the gills then leave a long tail.
Cap
Start with the color you chose for the cap.
Rnd 1: 6 sc in me (6)
Rnd 2: 6 inc (12)
Rnd 3: (sc, inc) x 6 (18)
Rnd 4: (sc, inc, sc) x 6 (24)
Rnd 5: (3 sc, inc) x 6 (30)
Rnd 6: (2 sc, inc, 2 sc) x 6 (36)
Rnd 7: (5 sc, inc) x 6 (42)
Rnd 8: (3 sc, inc, 3 sc) x 6 (48)
Rnd 9: (7 sc, inc) x 6 (54)
Rnd 10: (4 sc, inc, 4 sc) x 6 (60)
Rnd 11: (9 sc, inc) x 6 (66)
Rnd 12: (5 sc, inc, 5 sc) x 6 (72)
Rnd 13: (11 sc, inc) x 6 (78)
Rnd 14: (6 sc, inc, 6 sc) x 6 (84)
Rnd 15-19: (5 rounds) 84 sc (84)
If you want to join the cap and the gills by crocheting do not FO.
Rnd 16: take the gills and crochet both parts by facing their wrong sides together with 84 sc (84)
Important: don’t forget to stuff before sewing or crocheting them completely. Don’t stuff it firmly. Shape a hole in the middle where it is going to be sewed on the stalk.
Cap and the gills crocheted with sc together.
Cap and the gills are sew together.
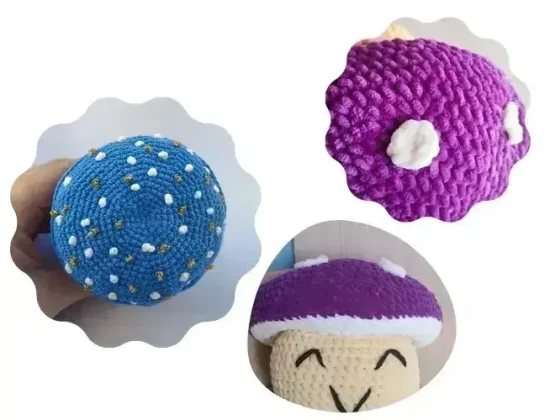
Scales
There are two options to make the scales:
- Make the scales by e,broidering french knots scatterred around the cap.
- Make as many scales as you like by crocheting
R1: 6 sc in mr (6)
R2: inc x 6 (12)
FO
Assembly
- Sew the legs from R2 to 6 of the stalk facing each other as in the picture below.
- Sew the gills on the stalk appr. on round 22.
- If you crocheted the scales, sew them scattered on the cap.
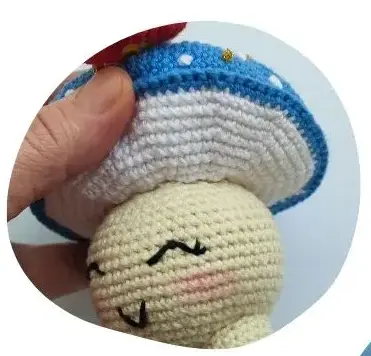
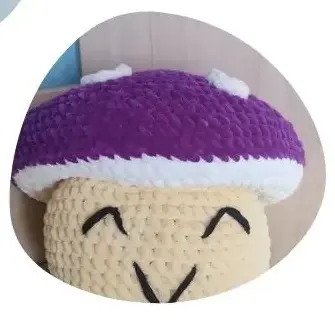
- Embroider the eyes on R15, 5 stitches apart and the mouth on rounds 10 to 11. If you like you can apply some blush on the cheeks.
And there you have it, a whimsical toadstool that’s sure to bring some magic into your life! Crocheting this amigurumi mushroom was an absolute delight, and I hope you enjoyed following along with the pattern.
There’s something truly special about creating handmade items, especially when they’re as cute as this little guy. Whether you choose to keep him for yourself or give him away as a gift, he’s sure to bring smiles wherever he goes.
So go forth and spread some whimsy with your new crocheted friend!