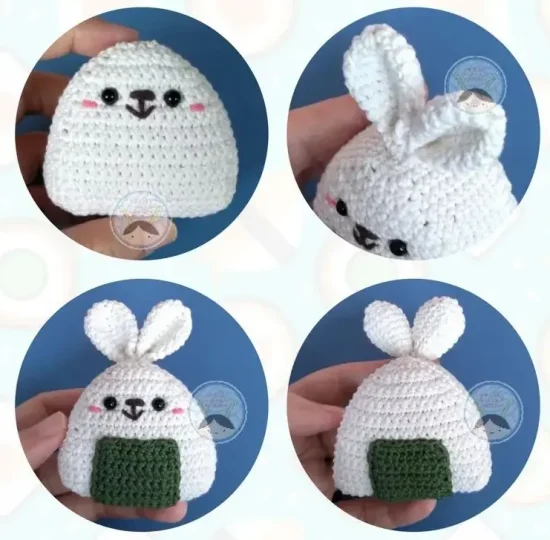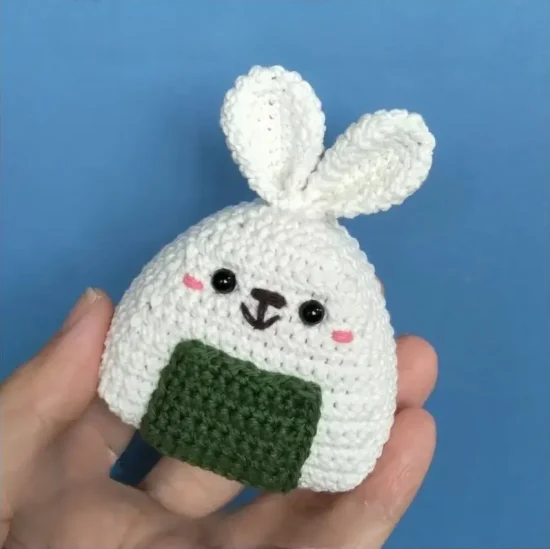
Alrighty, my crafty friends! Have you ever thought of merging the joy of amigurumi with the charm of onigiri? I sure have! And, voila – meet the amigurumi bunny onigiri. It’s like a pinch of Japan hopped into my yarn stash! For the uninitiated, onigiri is this scrumptious rice ball snack – but instead of rice, I’ve wrapped my hook around some yarn, and oh boy, what an adventure!
Every stitch made me giddy, as if I were on a little journey through Tokyo’s vibrant streets. And the bunny touch? Pure magic! Crafty folks, if you’re looking to crochet something that’s a tad quirky and a whole lot of fun, you’ve just hit the jackpot.
So, grab those hooks, let your creativity hop around, and soon enough you’ll be rolling with joy at your very own bunny-onigiri fusion. And trust me, it’s a conversation piece like no other!
Pattern Designer: Audrey lc
Materials
- 100% cotton yarn in sport weight
- 2.5 mm crochet hook
- Tapestry needle
- Scissors
- Fiberfill
- 5 mm safety eyes
Abbreviations
Rnd – round
Mr – magic ring
BLO – back loop only
Ch – chain
Sl st – slip stitch
Sc – single crochet
Inc – increase
Dec -decrease
Rice Ball 1st Part
We will work in rows. With white yarn, make ch 5. Start in 2nd chain from the hook.
Row 1: inc, 2 sc, inc, ch, turn (6)
Row 2: inc, 4 sc, inc, ch, turn (8)
Row 3: inc, 6 sc, inc, ch, turn (10)
Row 4: inc, 8 sc, inc, ch, turn (12)
Row 5: inc, 10 sc, inc, ch, turn (14)
Row 6-7: (2 rows) 14 sc, ch, turn (14)
Row 8: inc, 12 sc, inc, ch, turn (16)
Row 9-10: (2 rows) 16 sc, ch, turn (16)
Row 11: inc, 14 sc, inc, ch, turn (18)
Row 12-18: (7rows) 18 sc, ch, turn (18)
Row 19: 18 sc (18)
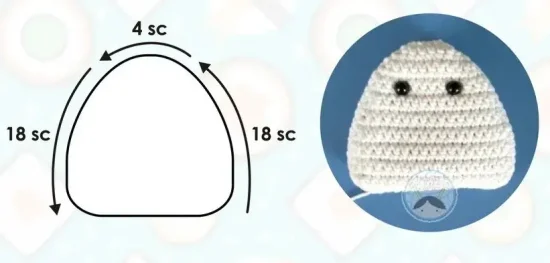
Next, we will continue to work around the side. Make 18 sc along the first side, 4 sc along the top part, then 18 sc along the other side. With the previous 18 sc in row 19, we will have 58 sc in total.
Next, we will crochet in continuous rounds.
Rnd 20: BLO 58 sc (58)
Rnd 21-26: (6 rounds) 58 sc (58)
Insert safety eyes on the first part of the rice ball, between rounds 6 and 7, 6 stitches apart.
Fasten off and leave a long tail for sewing.
Now we will work in rows.
Rice Ball 2nd Part
With white yarn, make ch 5. Start in 2nd chain from the hook. Repeat the instructions for row 1 to 19 in the first part. Then work around the side like in Part 1, we will have 58 sc in total.
Fasten off.
Nori (Seaweed)
We will work in rows.
With dark green yarn, make ch 10. Start in the 2nd chain from the hook.
Row 1-24: (24 rows) 9 sc, ch, turn (9)
Row 25: 9 sc (9)
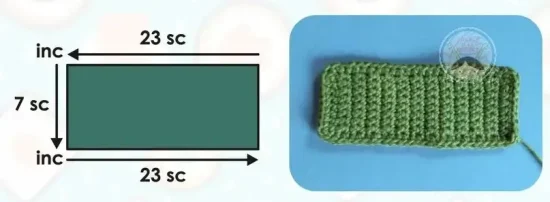
Next, we will continue to work around the side. Make 23 sc, along the first side, inc in the corner, 7 sc along the top part, inc in the corner. 23 sc along the other side.
Fasten off. Leave a long a long tail for sewing.
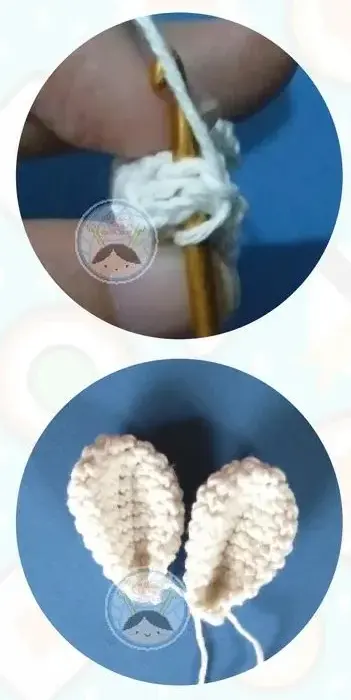
Ears x 2
Do not stuff. With white yarn.
Rnd 1: 6 sc in Mr (6)
Rnd 2: 6 inc (12)
Rnd 3: (sc, inc) x 6 (18)
Rnd 4-5: (2 rounds) 18 sc (18)
Rnd 6: (2 sc, dec, 2 sc) x 3 (15)
Rnd 7: 15 sc (15)
Rnd 8: (3 sc, dec) x 3 (12)
Rnd 9: 12 sc (12)
Flatten, make ch 1, then make 6 sc through both layers.
Fold the ears, make ch 1, then make 3 sl st though both layers.
Fasten off, leave a long tail for sewing.
Assembly
- Sew the second part to the first part. Insert the needle through both loops of the first part and both loops of the second part. Don’t forget to stuff it before we finish sewing it. Don’t overstuff it so it won’t get too bulky.
- Embroider the nose between rounds 6 and 7. The nose is 2 stitches wide. We go over the stitches 3 times.
- Embroider vertical line start from the center of the nose. The vertical line is 2 stitches tall. Then embroider smile on round 8.
- Embroider cheek blush between rounds 7 and 8 on the side of each eye. The cheek blush is 1 stitch wide. We go over the stitch twice.
- Wrap the nori around the onigiri, starting from row 12 on the first part until row 12 on the back part. Then sew it to the onigiri.
- Sew the ears on the top part of onigiri, centered. No
distance between the ears.